
I featured this triangular shawl in my blog last spring, but I didn't include the pattern. I'm going to add it to Ravelry soon, but here is the unedited version that I shared with a friend who is fairly new to knitting:
Here is the pattern which I got at a class taught by Colleen Davis, founder and former president of the North Coast Knitters Guild, which has meetings in San Diego County, California, each month (visit their guild website to see what they're all about). Colleen is a very inspiring teacher. This pattern actually was called "Cardigan Starting with a Pyramid", inspired by Hanne Falkenberg, interpreted by Colleen Davis. (Further interpreted by me....)
I used long circular needles (Addi Turbos) for this project; you can start on straight needles and then switch to (increasingly longer) circular needles as the shawl grows to the size you would like. When you cast on, you are actually working from the nape of the neck downward toward the point (apex) of the triangle.
1st Row: Cast on 3 stitches. (Right side)
2nd Row: Knit the row (wrong side), placing a stitch marker on each side of the center stitch.
3rd Row: Increase in the 1st stitch, slip marker, knit center stitch, slip marker, increase in last stitch. (2 increases made)
4th Row: Knit across (wrong side row).
The above 4 rows constitute the set-up for the overall triangular shaping technique. The shaping is as follows and continues until the shawl reaches the size you desire:
[*Row 5: Right side row. (Note: Put a safety pin on the right side so you can differentiate it from the wrong side in the pattern. All increases are done on the *right* side rows.)
*Increase in the 1st stitch, knit to 1 stitch before marker, increase in (that) next st, slip marker, k1 (this is the center stitch), slip marker, increase in next st, knit across to last st, inc in end st. (4 increases made) Whew!
Row 6: Wrong side row. Knit across. (That's easy!)*]
For clarification and in plain English: On every *right side row* an increase is made on the outside edges (i.e., in the first and last stitches of the row) and in each stitch on either side of the center stitch. The *wrong side rows* are knit straight across, with no increases.
Repeat rows 5 and 6 (between brackets) until the shawl is the size you desire.
You can use an additional set of circular needles towards the end to enable you to open up the shawl and gauge its length and drape more easily. After completing a row, use your second set of circular needles to begin knitting. (Cap the non-working ends of both sets of circular needles with tightly fitting point protectors--don't lose all your hard work at this stage).
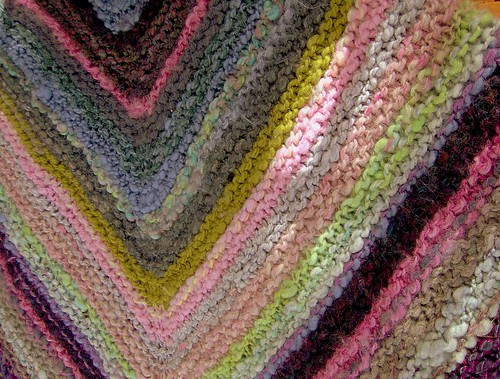
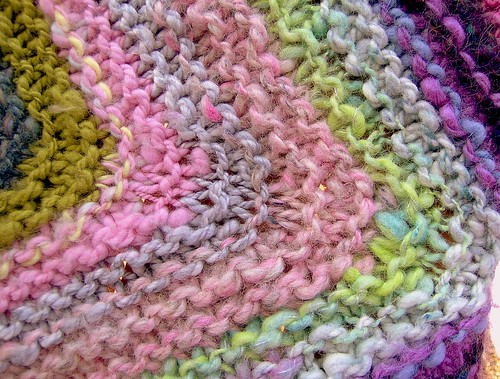
Knit until you reach the center stitch and again cap your needle ends with point protectors. Now you can get an idea of the length and drape of the finished shawl. But remember, the *point* of the triangle won't be liberated totally until you bind off loosely and end the project. Change colors and textures of yarn to your heart's content. On the back of the shawl you will have a noticeable chevron design, especially if you change colors and make stripes.
Enjoy! If you have any questions, just let me know. It's a lot simpler than it sounds in the pattern.
Note: You may use any yarns that strike your fancy in any size and gauge. The shawl grows organically and you can try it on as you knit and get a rough idea of how it will look.


No comments:
Post a Comment